Colorbond roof sheets are a popular, durable, and weather-resistant roofing solution. Made from steel, they offer long-lasting protection and come in various colors. This guide explains the installation process, ensuring a secure and aesthetically pleasing roof.
Overview of Colorbond Roofing
Colorbond roofing is a durable, weather-resistant solution made from steel, often coated with zinc for corrosion protection. It is available in various colors, offering both aesthetic appeal and long-lasting performance. Known for its strength and low maintenance, Colorbond roofing is resistant to termites, rot, and extreme weather conditions. It is a popular choice for Australian homes due to its ability to withstand harsh climates. The material is lightweight yet robust, making it an ideal option for modern roofing needs while providing excellent thermal insulation properties.
Benefits of Using Colorbond Roof Sheets
Colorbond roof sheets offer exceptional durability, resistance to weathering, and a sleek, modern appearance. They are lightweight, easy to install, and require minimal maintenance. With a wide range of colors available, they can complement any home’s design. The zinc-coated steel core provides superior corrosion resistance, while the pre-painted finish ensures long-lasting protection. Colorbond roofing is also termite-proof and resistant to rot, making it a cost-effective and sustainable choice. Its thermal performance helps regulate home temperature, potentially reducing energy costs over time. A long-lasting, versatile option for any climate.
Preparation for Installation
Preparation involves measuring the roof area, removing old materials, and ensuring a clean, safe workspace. Proper planning and safety measures are essential for a successful installation.
Measuring and Planning the Roof Area
Accurate measurement is crucial for a seamless installation. Measure the roof’s length, width, and pitch to determine material requirements. Calculate the total area, considering overlaps and waste. Use a tape measure and calculator for precision. Ensure measurements align with Colorbond sheet dimensions, typically 762mm cover width. Plan the layout to avoid obstacles like vents or skylights. Add 10% to your material list for cuts and waste. Proper planning prevents errors and ensures efficient use of resources. Always double-check measurements before ordering materials.
Removing Old Roofing Materials
Before installing Colorbond roof sheets, remove all existing roofing materials, including nails and debris. Start by taking off ridge caps and working downward. Use tools like hammers, screwdrivers, and pry bars to carefully lift and remove old sheets. Protect yourself with gloves and safety goggles. Dispose of materials responsibly. Ensure the roof structure is clean and clear of sharp edges or remaining fasteners. Inspect battens or trusses for damage and repair as needed. A clean surface ensures proper installation of new Colorbond roofing.
Installing Gutters, Fascias, and Battens
Begin by installing gutters and fascias, ensuring they align with the roof’s edge. Battens are then fixed to the trusses, providing a secure base for the Colorbond sheets. Measure and cut battens to fit, spacing them evenly. Use durable materials to prevent corrosion and ensure structural integrity. Proper installation of gutters, fascias, and battens is crucial for effective water drainage and a stable roofing system. Follow manufacturer guidelines for spacing and fastening to ensure a long-lasting setup.
Safety Considerations
Ensure proper safety measures when installing Colorbond roof sheets. Protect against falls, use appropriate PPE, and avoid incompatible metals to prevent corrosion and ensure a secure installation.
Personal Protective Equipment (PPE)
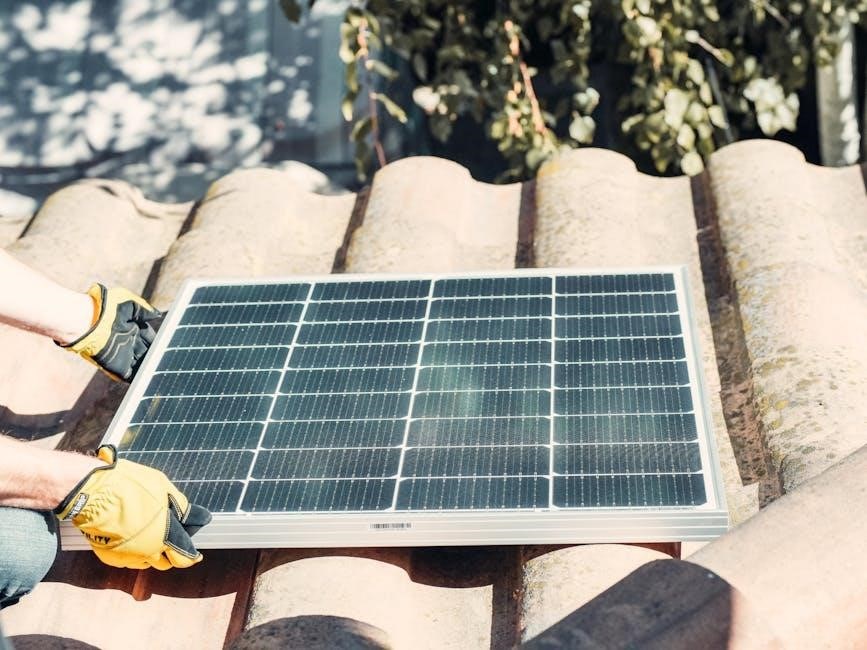
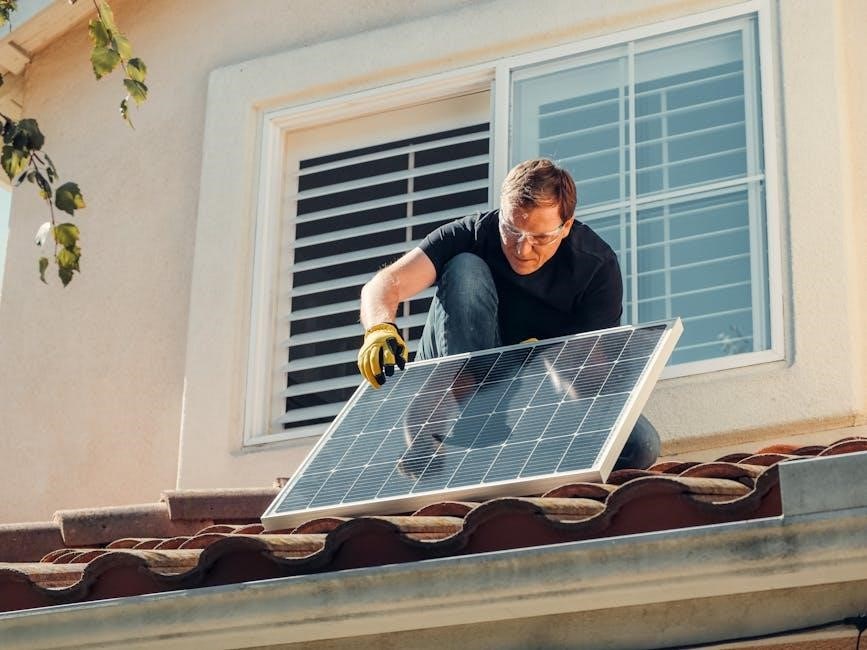
Always wear appropriate PPE when installing Colorbond roof sheets. This includes gloves, safety glasses, and steel-capped boots to protect against cuts and falls. Use a dust mask when cutting sheets to avoid inhaling particles. Ensure proper fall protection gear, such as harnesses, is used when working at heights. Regularly inspect PPE for damage and replace as needed to maintain safety standards throughout the installation process.
Working at Heights Safely
Working at heights requires careful planning and adherence to safety protocols. Always use a sturdy ladder or scaffolding and ensure it is securely positioned. Wear a harness and attach it to a stable anchor point when working on steep or high roofs. Regularly inspect equipment for damage or wear. Ensure proper lighting and clear visibility on the roof surface. Avoid working at heights during strong winds or wet conditions. Always maintain three points of contact (two hands and one foot, or two feet and one hand) when climbing or moving on the roof.
Avoiding Corrosion and Incompatible Metals
Avoiding corrosion is crucial for the longevity of Colorbond roof sheets. Ensure no contact with untreated timber, as it can cause corrosion. Incompatible metals, such as copper or zinc, should not come into direct contact with Colorbond steel. Always use Class 4 screws, specifically designed for metal roofing, to prevent corrosion. Keep the roof clear of debris and avoid touching up minor scratches, as this can compromise the protective coating. Regularly inspect the roof for signs of corrosion and address issues promptly to maintain its durability and appearance.
Installing Sarking or Roof Blankets
Sarking is a reflective, insulating layer installed under Colorbond sheets. Begin by rolling it across battens from the bottom edge, working upward. Ensure a tight, wrinkle-free fit for optimal protection and energy efficiency.
What is Sarking?
Sarking is a thin, reflective material installed under Colorbond roof sheets. It acts as insulation, reducing heat transfer and noise, while also protecting the roof from weather elements. Available in foil or insulated blanket forms, sarking enhances energy efficiency and provides an extra layer of defense against moisture and pests. Properly installed sarking ensures a more comfortable living space and prolongs the lifespan of your Colorbond roofing system by maintaining a stable and dry environment beneath the sheets.
Rolling Out Sarking Across Battens
Rolling out sarking across battens is a crucial step in Colorbond roof installation. Start at the bottom edge of the roof, ensuring the sarking is evenly spread and tightly fitted. Use a utility knife to trim excess material around vents or obstructions. Secure the sarking to battens with staples or tape, maintaining a smooth surface. Proper alignment prevents wrinkles and ensures optimal performance. Work upward, overlapping layers as needed, to create a seamless barrier. This step ensures insulation and weather protection are maximized before laying the roof sheets.
Laying Colorbond Roof Sheets
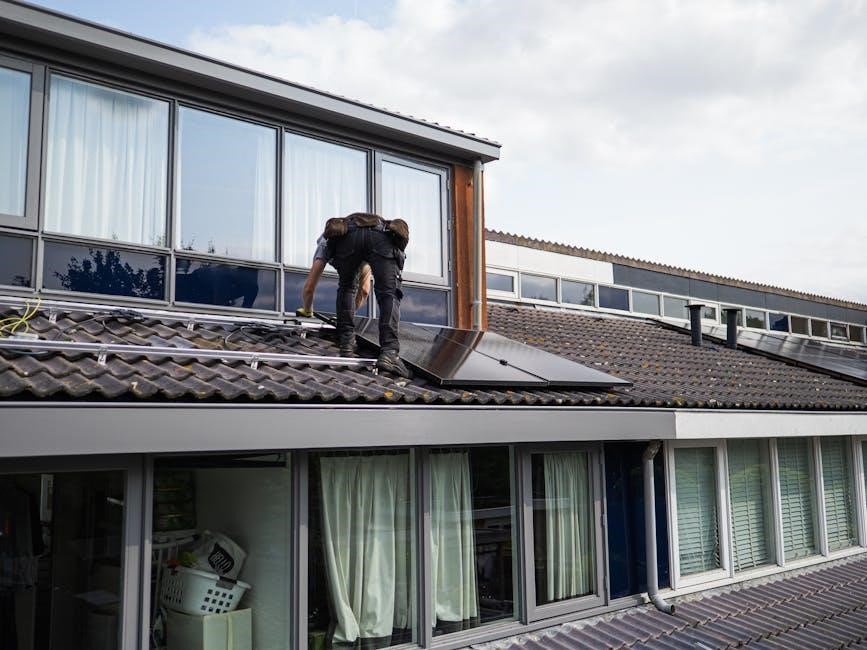
Position Colorbond sheets on the roof, starting from the opposite side of the prevailing wind. Align and secure them with fasteners, ensuring proper overlap and alignment. Always follow manufacturer guidelines for installation.
Positioning Sheets on the Roof
Position Colorbond sheets starting from the side opposite the prevailing wind to prevent wind uplift. Align sheets with battens and sarking, ensuring proper orientation. Begin at the bottom edge, working upward, allowing a 50mm overhang for gutters. Lay sheets on the ground first, marking with chalk lines for accurate placement. Ensure the overlapping side faces the installation direction. Fasten temporarily before final securing to verify alignment. Always follow manufacturer guidelines for correct positioning and installation.
Aligning and Securing Sheets
Align Colorbond sheets with the chalk line, ensuring proper orientation and spacing. Use a spirit level to verify straight alignment. Secure sheets with hex head screws, spacing them 300mm apart on battens and 400mm at overlaps. Start fastening from the center, working outward to prevent buckling. Ensure side laps are correctly aligned (one and a half corrugations) and end laps are 150mm. Check all fasteners for tightness and proper placement. Avoid over-tightening to prevent damage. Ensure sheets are evenly spaced and aligned before final securing.
Overlapping and Fastening Sheets
Overlap Colorbond sheets by one and a half corrugations for side laps and 150mm for end laps. Ensure overlaps face the direction of installation to prevent water ingress. Fasten sheets using hex head screws, placing them at the crest of each corrugation. Maintain uniform spacing of 300mm between screws on battens and 400mm at overlaps. Check that all fasteners are secure but not over-tightened, as this can damage the sheet. Proper overlapping and fastening ensure structural integrity and weather-tightness, adhering to manufacturer guidelines for optimal performance.
Fixing and Securing Roof Sheets
Hex head screws are used to fasten Colorbond sheets, ensuring a secure and weather-tight seal. Proper spacing and alignment are vital for structural integrity and durability.
Using Hex Head Screws for Fastening

Hex head screws are essential for securing Colorbond roof sheets. They provide a strong, weather-tight seal and are designed to withstand harsh conditions. The screws feature a large head that prevents them from pulling through the metal, ensuring a durable fastening system. Proper spacing and alignment are critical to avoid damage and maintain structural integrity. The screws should be galvanized to resist corrosion and match the Colorbond sheet’s finish. Using the correct screws ensures a secure and long-lasting roof installation, protecting against leaks and weather damage.
Ensuring Proper Side Lap and End Lap
Proper side lap and end lap are critical for a watertight and secure Colorbond roof. The side lap should overlap by one and a half corrugations, while the end lap typically ranges from 150mm to 200mm. Ensure sheets are aligned correctly and overlaps face the same direction as installation. Secure overlaps with fasteners spaced evenly to maintain structural integrity. Proper lapping prevents water ingress and ensures a durable, weather-resistant roof. Always follow manufacturer guidelines for specific lap measurements and sealing techniques to guarantee a long-lasting installation.
Installing Ridge Caps
Ridge caps cover the roof’s peak, protecting against weather and adding a finished look. Measure, cut, and secure them with screws for a durable seal.
Measuring and Cutting Ridge Caps
Accurate measurement is crucial for fitting ridge caps. Measure the roof’s peak length and mark the ridge cap material accordingly. Use a square to ensure straight cuts. Cut the cap to size using a saw or tin snips, leaving a slight overhang for secure fitting. Ensure alignment with the roof’s peak and gutters. Properly fitted caps prevent water leaks and enhance durability. Always follow manufacturer guidelines for precise cutting and alignment to maintain structural integrity and aesthetic appeal.
Securing Ridge Caps to the Roof
Once cut, ridge caps are secured to the roof using hex head screws. Start at the center and work outward to avoid buckling. Ensure caps are tightly fastened to the roof sheets, overlapping at the ridge for a watertight seal. Use foam closure strips for a snug fit. Check alignment to prevent water pooling. Proper securing ensures durability and prevents leaks. Always follow manufacturer guidelines for screw placement and spacing to maintain structural integrity and aesthetic appeal.

Flashing and Sealing
Flashing and sealing are critical for preventing water ingress and ensuring roof durability. Properly installed flashings around vents, skylights, and edges protect against leaks and weather damage.
Installing Flashings Around Vents and Skylights
Installing flashings around vents and skylights is essential to prevent water leaks and damage. Measure the vent or skylight carefully and cut the flashing to fit snugly. Secure the flashing with screws, ensuring a watertight seal. Use compatible materials to avoid corrosion and ensure longevity. Properly installed flashings protect vulnerable areas from weather damage, maintaining the integrity of your Colorbond roof.
Sealing Gaps and Edges
Sealing gaps and edges is crucial to ensure water tightness and prevent leaks. Use silicone sealant or specialized roofing tapes to cover all gaps between roof sheets, flashings, and edges. Apply sealant around vents, skylights, and where sheets meet other structures. Regularly inspect and maintain these seals to prevent deterioration. Proper sealing enhances durability and protects your Colorbond roof from weather damage, ensuring long-term performance and structural integrity.

Final Alignment and Inspection
Ensure all Colorbond sheets are properly aligned and securely fastened. Inspect the roof for any gaps, loose fasteners, or misaligned sections. Verify that the roof is watertight and visually consistent before finalizing the installation.
Checking for Proper Alignment
Proper alignment is crucial for ensuring the structural integrity and visual appeal of Colorbond roof sheets. Begin by visually inspecting the roof to ensure all sheets are evenly spaced and aligned with the roof edges. Use a chalk line to mark straight lines and verify that each sheet is correctly positioned relative to the battens. Ensure that the overlapping sections are consistent and face the correct direction. Proper alignment prevents water from pooling and guarantees a seamless, professional finish. This step is essential for both functionality and aesthetics.
Inspecting for Gaps or Loose Fasteners
After installing Colorbond roof sheets, inspect the entire roof for any gaps or loose fasteners. Gaps can allow water infiltration, leading to damage. Check all hex head screws to ensure they are tightly secured and evenly spaced. Use a screwdriver or wrench to tighten any loose fasteners. Additionally, verify that the side laps and end laps are properly aligned and sealed. Addressing these issues promptly ensures long-term durability and prevents potential leaks or structural weaknesses. Regular inspections are key to maintaining the integrity of your Colorbond roof.
Maintenance and Repair
Regular inspection and cleaning of Colorbond roof sheets are essential to maintain their durability. Address damaged or corroded areas promptly to prevent further deterioration and ensure longevity.
Cleaning and Inspecting the Roof
Regular maintenance ensures the longevity of Colorbond roof sheets. Start by clearing debris like leaves and branches to prevent water accumulation. Inspect the roof for signs of corrosion, dents, or loose fasteners. Use a soft-bristle brush or a garden hose to clean the surface gently. Avoid using abrasive materials or harsh chemicals, as they may damage the paint finish. For tougher stains, mix mild detergent with water and apply it with a soft cloth. Rinse thoroughly to remove any residue. Inspect flashing, gutters, and downpipes for proper function. Address any issues promptly to prevent leaks or further damage. Regular cleaning and inspection help maintain the roof’s appearance and structural integrity, ensuring it remains durable and weather-resistant for years to come.
Repairing Damaged or Corroded Areas
Inspect the roof regularly for damaged or corroded sections. Minor scratches can be touched up with Colorbond-compatible paint, but severely damaged areas may require replacement. If corrosion is present, ensure incompatible metals are not causing the issue. Replace damaged sheets by removing fasteners and carefully lifting the section. Use class 4 screws for secure reinstallation. Avoid patching severely corroded areas, as this can lead to further deterioration. Always follow manufacturer guidelines for repairs to maintain the roof’s integrity and warranty. Addressing issues promptly prevents leaks and extends the roof’s lifespan.

Cost Considerations
Colorbond roof sheets cost between $18 to $24 per sheet, with installation starting at $53. Long-term durability offers significant savings on maintenance and energy costs.
Material and Labor Costs
Colorbond roof sheets typically cost between $18 to $24 per sheet, depending on size and profile. Installation labor costs start at $53 and vary based on roof complexity, size, and location. Materials like gutters, fascias, and battens add to the total expense. Factors such as roof pitch, accessibility, and site conditions can increase labor fees. It’s essential to request detailed quotes from professionals to understand all associated costs and ensure budget accuracy for your roofing project.
Long-Term Durability and Savings
Colorbond roofs are known for their exceptional durability, lasting decades with minimal maintenance. Their steel composition resists rot, termites, and corrosion, reducing long-term repair costs. The pre-painted finish retains its appearance, avoiding frequent repainting. Energy savings come from reflective properties that reduce heat absorption, lowering cooling expenses. Sarking adds insulation, further enhancing energy efficiency. While initial costs may be higher, the enduring performance and low upkeep make Colorbond a cost-effective choice for homeowners seeking long-term value and reliability.
Colorbond roof sheet installation offers durability, low maintenance, and long-term savings. With proper installation, it provides a reliable and aesthetically pleasing roofing solution for years to come.
Colorbond roof installation involves several critical steps, starting with preparing the roof area and installing gutters, fascias, and battens. Next, sarking or roof blankets are rolled out for insulation and weatherproofing. The Colorbond sheets are then laid, aligned, and secured with hex head screws, ensuring proper side and end laps. Ridge caps are measured, cut, and attached for a seamless finish. Flashing is installed around vents and skylights, and all gaps are sealed. Finally, the roof is inspected for alignment and any loose fasteners, ensuring a durable and leak-proof finish.
Final Thoughts on Colorbond Roof Sheet Installation
Colorbond roof sheet installation is a rewarding process that enhances your home’s durability and aesthetic appeal. With proper planning, safety measures, and attention to detail, you can achieve a professional-grade finish. The durability of Colorbond steel, combined with its weather-resistant properties, ensures long-term protection. Regular maintenance and inspections will extend the lifespan of your roof. Whether you’re a DIY enthusiast or hiring professionals, the end result is a sleek, modern roofing solution that withstands harsh conditions and adds value to your property.
Additional Resources
Explore recommended tools and materials for Colorbond roof installation. Refer to the Lysaght construction manual and further reading materials for detailed guidance and professional assistance.
Recommended Tools and Materials
For a successful Colorbond roof installation, use hex head screws, drills, and a chalk line. Essential materials include Colorbond Ultra, ZINCALUME steel, and sarking. Ensure you have safety gear like gloves and harnesses. Proper tools like a tape measure, spirit level, and roofing cutter are also necessary. Refer to the Lysaght construction manual for specific product recommendations. Always choose materials compatible with Colorbond to prevent corrosion and ensure durability. Proper tools and materials ensure a smooth and professional installation process.
Further Reading and Professional Help
For detailed guidance, refer to the LYSAGHT construction manual and AS 1562.1:1992 for design and installation standards. Visit manufacturer websites like Lysaght for specific product guides. If unsure, consult professionals experienced in Colorbond installations. They can provide tailored advice and ensure compliance with local building codes. Online forums and roofing communities also offer valuable insights and troubleshooting tips. Always prioritize safety and quality by seeking expert help when needed.